WHIP FINISH
See WHIP FINISH ANIMATION for live action.
|
A. Whip Finish
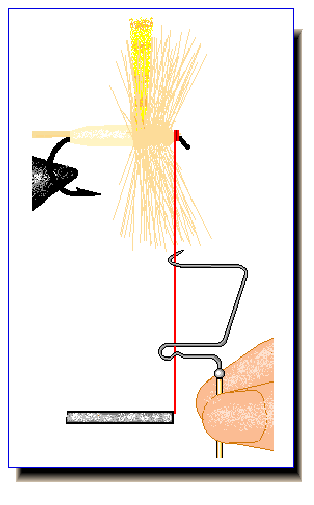
1) Take thread and hold down below shank.
Place whip finisher against thread as shown with thread hooked on
end of tool.
|
|
|
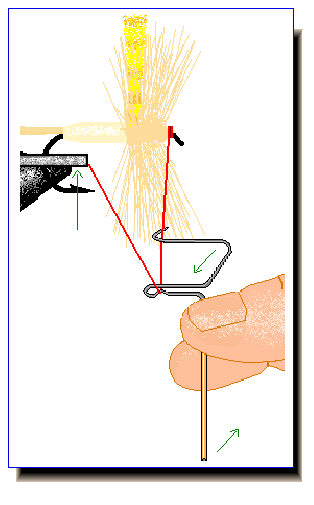
2)Bring bobbin up and against hook shank while
bringing whip finisher handle toward you in preparation for the
next operation. This next move is the hard part.
|
|
|
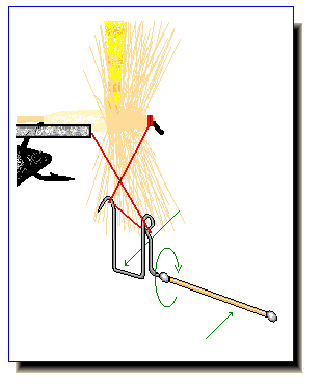
3)Flip finisher so that handle points out
from hook eye and thread forms a figure four. No this is not a wrestling take down.
|
|
| Whip finishing without tying down
your hackle barbs, especially on a parachute pattern, is a pain. You might try this, after you
make the figure four with the thread using the finish tool, hold the bobbin in your pinky and
try pulling back the hackle with three fingers, then continue whip finish. |
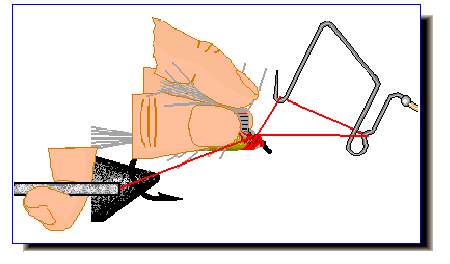
I told you starting the thread was the easy part!
|
|
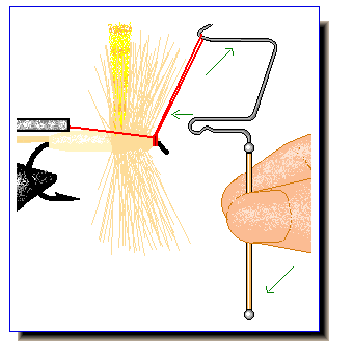
6) Make 5 or 6 wraps with finisher. End with
hook of finisher above shank. Tilt handle down and let thread
slip from lower thread catch with only finisher hook holding
thread.
|
|
|
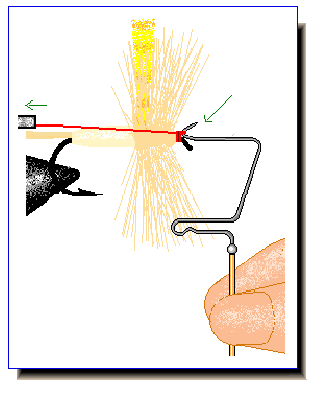
7)Pull bobbin backward from hook bend, this will bring
finisher hook to hook eye. Slip finisher hook out of thread and
tighten thread with rearward pull of bobbin. Cut excess thread.
|
|
One last instruction!
Go immediately
to nearest river and proceed to put your fly in a tree on the first
cast. This will cause you to loose the fly and you are now forced
to tie another, This is how we get good at tying flies!
Light Cahill, Adams Dry,ElkHair Caddis, Wooly Bugger, Pheasant Tail
Hare's Ear,BWO Parachute, Prince, Red Quill, Royal Wullf, Irresistable
CLOUSER MINNOW ,TELLICO, LEFTY'S DECIEVER , BEETLE , HOPPER
HOMEPAGE


